
Project Bathroom: Day Three

So day three arrived and I was feeling awful... huge sinus headach,  so I took a nap in the morning and unforunately did not wake up until about 30 min after the baby went down for her nap, 3 and a half hours later she was still napping...

finaly I was able to get started again... it went incredibly quickly.

Day Three

Step One remove the rest of the drywall the remaining wall and ceiling to me a little more than an hour including time to clean up the  bits of drywall and and nails form the room.
 the things you find when you removes walls... this return vent does not appear to be attached to a vent.
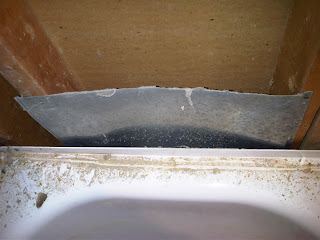
 However it looks like the dry wall may have been acting as the vent will have to look closer once the tub is removed.
And the best part of day 3... one last bubble bath to relax before the new tub is installed!

Comments

Popular posts from this blog

Reusable Cotton Mak-Uup Pads...Tutorial

Make Your Own Cotton Make-Up Removal Pads A Tutorial I have been a a de stashing kick lately and one of the things I have a lot of bits of is cotton yarn.  I recently renovated my Master bathroom and as a result I have been trying to de clutter and one thing I figured I could get ride of is the cotton pads and balls from under the sink (by using them) and replace them with a single set of reusable cotton pads that will a small jar on my counter and in doing so also save me some money by  keeping me form buying more single use cotton pads in the future.  As I was making my little circles I took some photos to share the process with you. Step 1 Create a magic circle and cast on 6 Step 2 Close the Magic Circle Step 3 Chain one, 2 Single Crochet in each Single crochet and slip stich to close Step 4 Chain 2, 2 Double Crochet in each single crochet and slip stitch.     Step 5 With Darning needle sew in the loose ends Step 6 Clip remaining ends Repeat as needed.

New Posts Coming Soon!

It has been a while since I have posted anything new  that does not mean I have not been Crafty  but rather just busy with life.  As the new school year  is started I find myself making resolutions  to organize my family and be more crafty and decided it was time to bring back the blog to keep myself accountable for my crafty plans .To that end I have a new series in the works and I am hoping to have the 1st post up next weekend so stay tuned for exciting things soon. -Erin

My favourite diaper bag...

So I was over at  Craft Gossip  before Halloween and saw the cutest little diaper bag made from the babies outgrown overalls and as luck would have it I had a pair sitting at the front door that I loved and was just about to give away so I dragged them down stairs to my machine and pulled up the tutorial over at  Sew and Grow   and shortly their after I had a cute little bag made from a pair of my favourite baby overalls. I love this bag because I attaches to your purse and therefore you only need to throw one bag strap over your shoulder.  it is also great for leaving the little ones at a babysitter, grandma or other spot just unsnap the bag and leave it with them. Finally it can be strapped onto a stroller quickly so you have easy access to the snaks. the only thing I would do different next time and there will be a next time is use a pair of overalls that are not made from a knit fabric that way it will not bulge so much when stuffed full and hold its shape a little better.